


Overview
MERN stack is a popular web development technology stack that includes MongoDB, Express.js, React.js, and Node.js. It is a very powerful stack that allows developers to build scalable and robust web applications.
Design Architecture of the Project:
I have used Coggle as a mind-mapping tool .Below is the whole structure of how the backend will work .
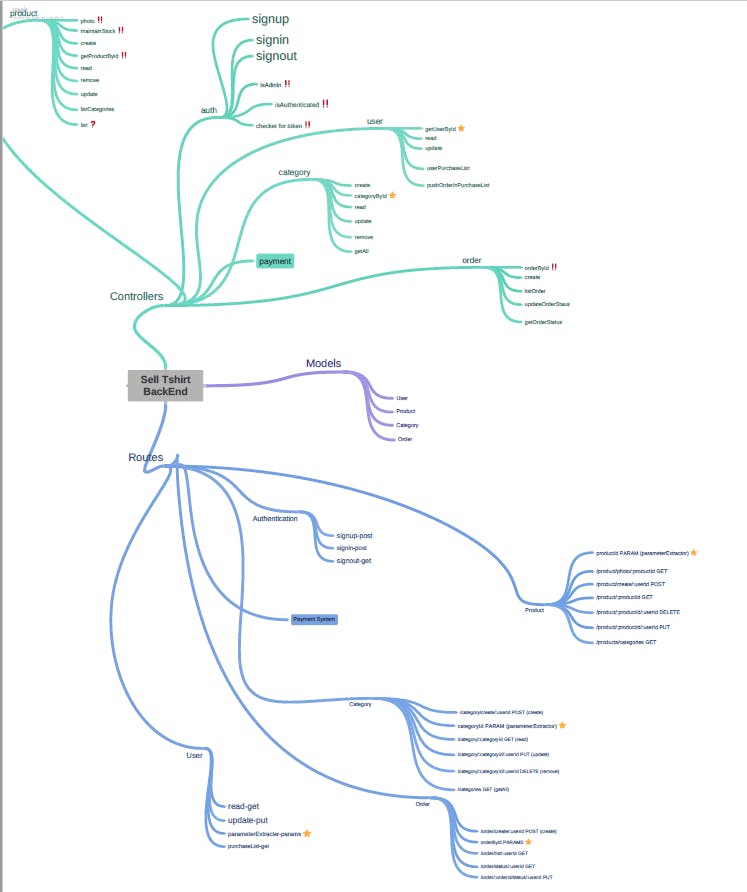
MERN Stack Project Structure
The MERN stack project structure is organized in a way that separates the backend and frontend code. It follows the MVC (Model-View-Controller) architecture pattern. This pattern allows developers to separate the concerns of the application into three main components.
Key Features
a. User Authentication: To ensure a personalized experience, users can create accounts, log in securely, and manage their profiles.
b. Recipe Creation and Sharing: Registered users can create, edit, and share their unique recipes. The platform supports text, images, and even video embedding for comprehensive recipe presentation.
c. Search and Filter: A robust search functionality allows users to find recipes based on keywords, ingredients, or cuisine types, making exploration a breeze.
d. Responsive Design: The platform is designed to provide a seamless experience across various devices, from desktops to smartphones.
4. Development Journey
a. Planning and Design: I started by sketching wireframes and planning the database structure. Clear user stories and use cases helped guide the development process.
b. Front-end Development: The user interface was brought to life using HTML and CSS, with JavaScript adding interactivity. I implemented a user-friendly form for recipe submission and integrated rich text editing for detailed recipe descriptions.
c. Back-end Development: Node.js and Express.js formed the backbone of the server, handling API requests, user authentication, and database interactions. The use of MongoDB ensured efficient data storage and retrieval.
d. Testing and Debugging: Rigorous testing was carried out at every stage to identify and rectify any bugs or inconsistencies. Postman was invaluable for API testing.
e. Deployment and Hosting: The platform was deployed using cloud services, and a FREE platform for demonstration purpose
.
5. Lessons Learned
This full-stack project was an incredible learning experience. I gained a deeper understanding of front-end and back-end interactions, user authentication, database management, and deployment processes. Moreover, I honed my problem-solving skills and learned to balance functionality with aesthetics.
Model
The Model component is responsible for managing the data and the business logic of the application. In the MERN stack, MongoDB is used as the database, which stores the data used in the application. The model's directory contains the database schema and the functions that interact with the database.
Controller
The Controller component is responsible for handling the user input and updating the Model and View components accordingly. In the MERN stack, the backend code is built using Node.js and Express.js. The controller's directory contains the functions that handle the HTTP requests and responses.
Server Directory
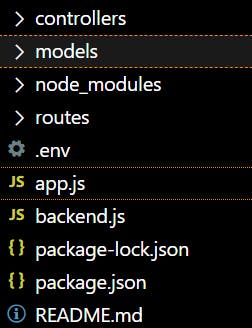
The server directory contains the backend code of the web application. The backend code is built using Node.js and Express.js. The server directory contains the following directories and files:
controllers directory: This directory contains the controllers of the application.
models directory: This directory contains the models of the application.
routes directory: This directory contains the routes of the application.
app.js file: This file is the entry point of the backend application.
backend.js file: This file connects the backend to frontend using the environment variable .env
Client Directory
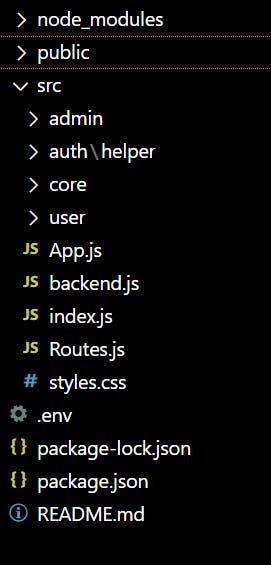
The client directory contains the front-end code of the web application. The frontend code is built using React.js. The client directory contains the following directories and files:
public directory: This directory contains the HTML file that is displayed in the browser.
src directory: This directory contains the source code of the frontend application. The src directory contains the following directories and files:
components directory: This directory contains the React components of the application.
App.js file: This file is the main file of the frontend application that renders the components.
index.js file: This file is the entry point of the front-end application.
Required NPM packages for MERN Stack app development
body-parser: The body-parser npm module is a JSON parsing middleware. It helps to parse the JSON data, plain text, or a whole object.
CORS: This is a Node JS package, also known as the express js middleware. It allows enabling CORS with multiple options. It is available through the npm registry.
Express.js: Express js is a free open source Node js web application framework. It helps in creating web applications and RESTful APIs and act as middleware
Mongoose: Mongoose is a MongoDB ODM for Node. It allows you to interact with the MongoDB database.
cookie-parser: A middleware for Express.js that parses and manages HTTP cookies, making it easier to work with cookie data in your web application.
dotenv: A zero-dependency package that loads environment variables from a
.envfile into the process environment, making it simple to manage configuration settings.express-jwt: Middleware for Express.js that provides JSON Web Token (JWT) authentication and authorization, allowing you to secure routes and endpoints based on token validation.
express-validator: A set of middleware functions for Express.js that simplifies input validation and sanitization, helping prevent common security vulnerabilities and improving data integrity.
formidable: A form parsing middleware for Express.js that handles incoming HTML form data, such as file uploads, and provides a convenient API for processing and managing these requests.
jsonwebtoken: A library that allows you to sign and verify JSON Web Tokens (JWTs), which are used for secure authentication and information exchange between parties.
lodash: A utility library that provides a collection of functions for common programming tasks, offering concise and efficient ways to manipulate arrays, objects, strings, and more.
morgan: A logging middleware for Express.js that generates HTTP request logs, providing useful information about incoming requests and their responses, which aids in debugging and monitoring.
uuid: A package for generating universally unique identifiers (UUIDs), which are often used to assign unique identifiers to entities in a distributed system or database.
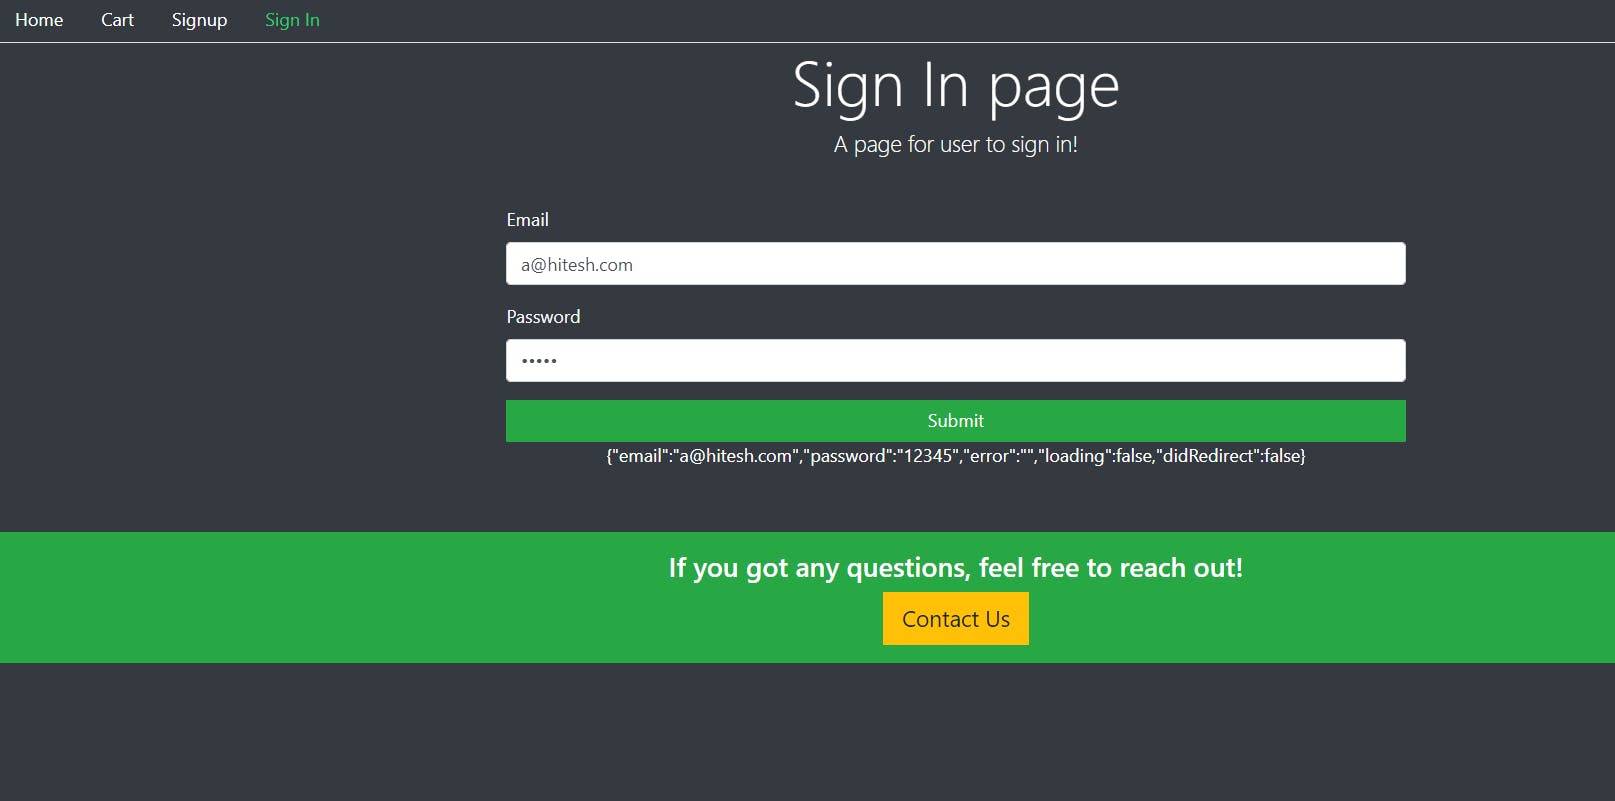
Signin :
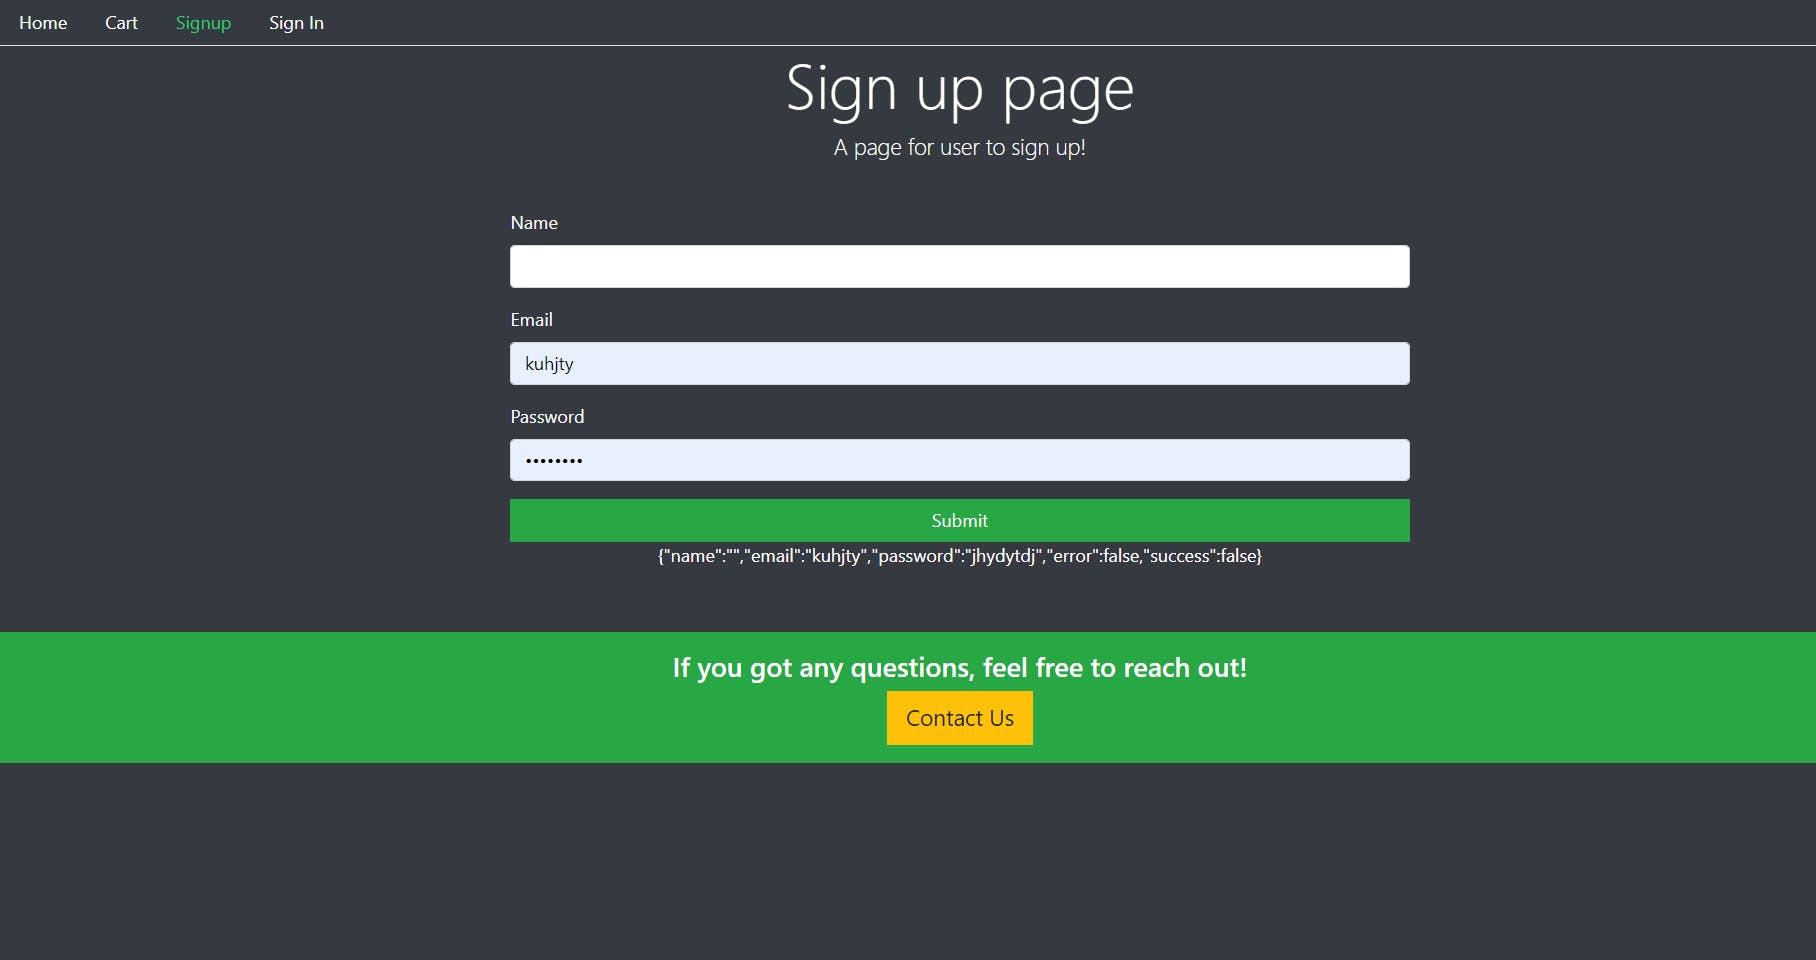
SignUp:
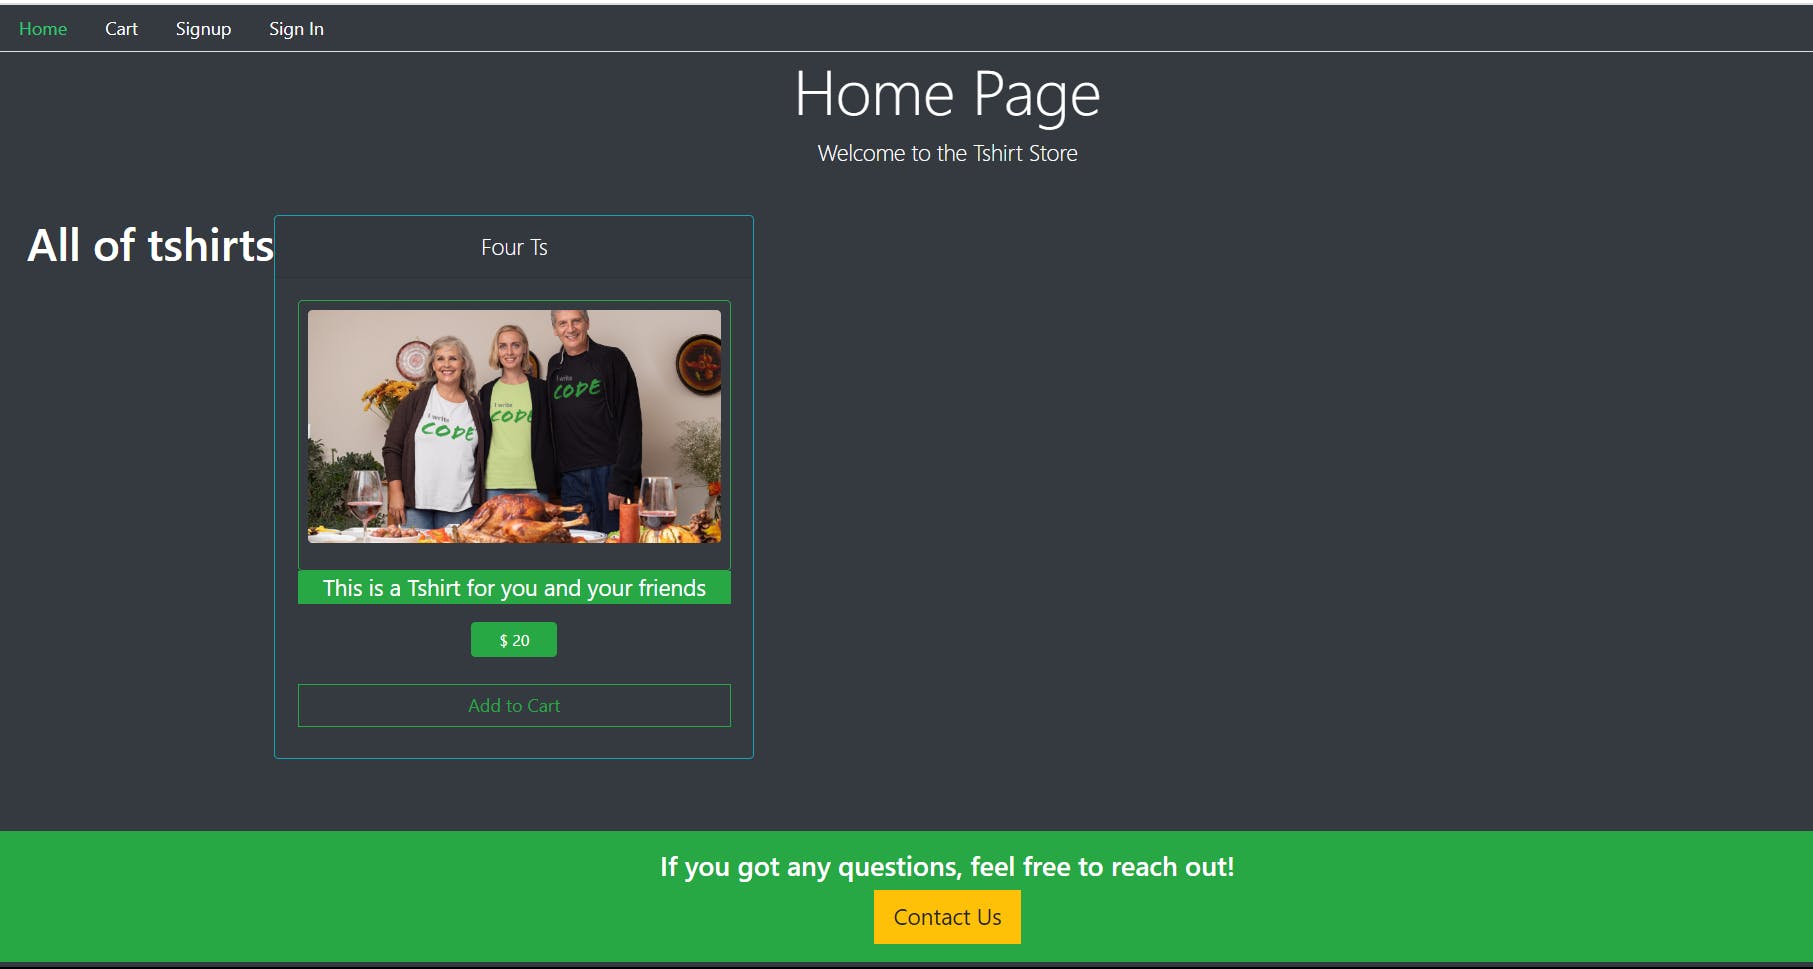
Home Page:
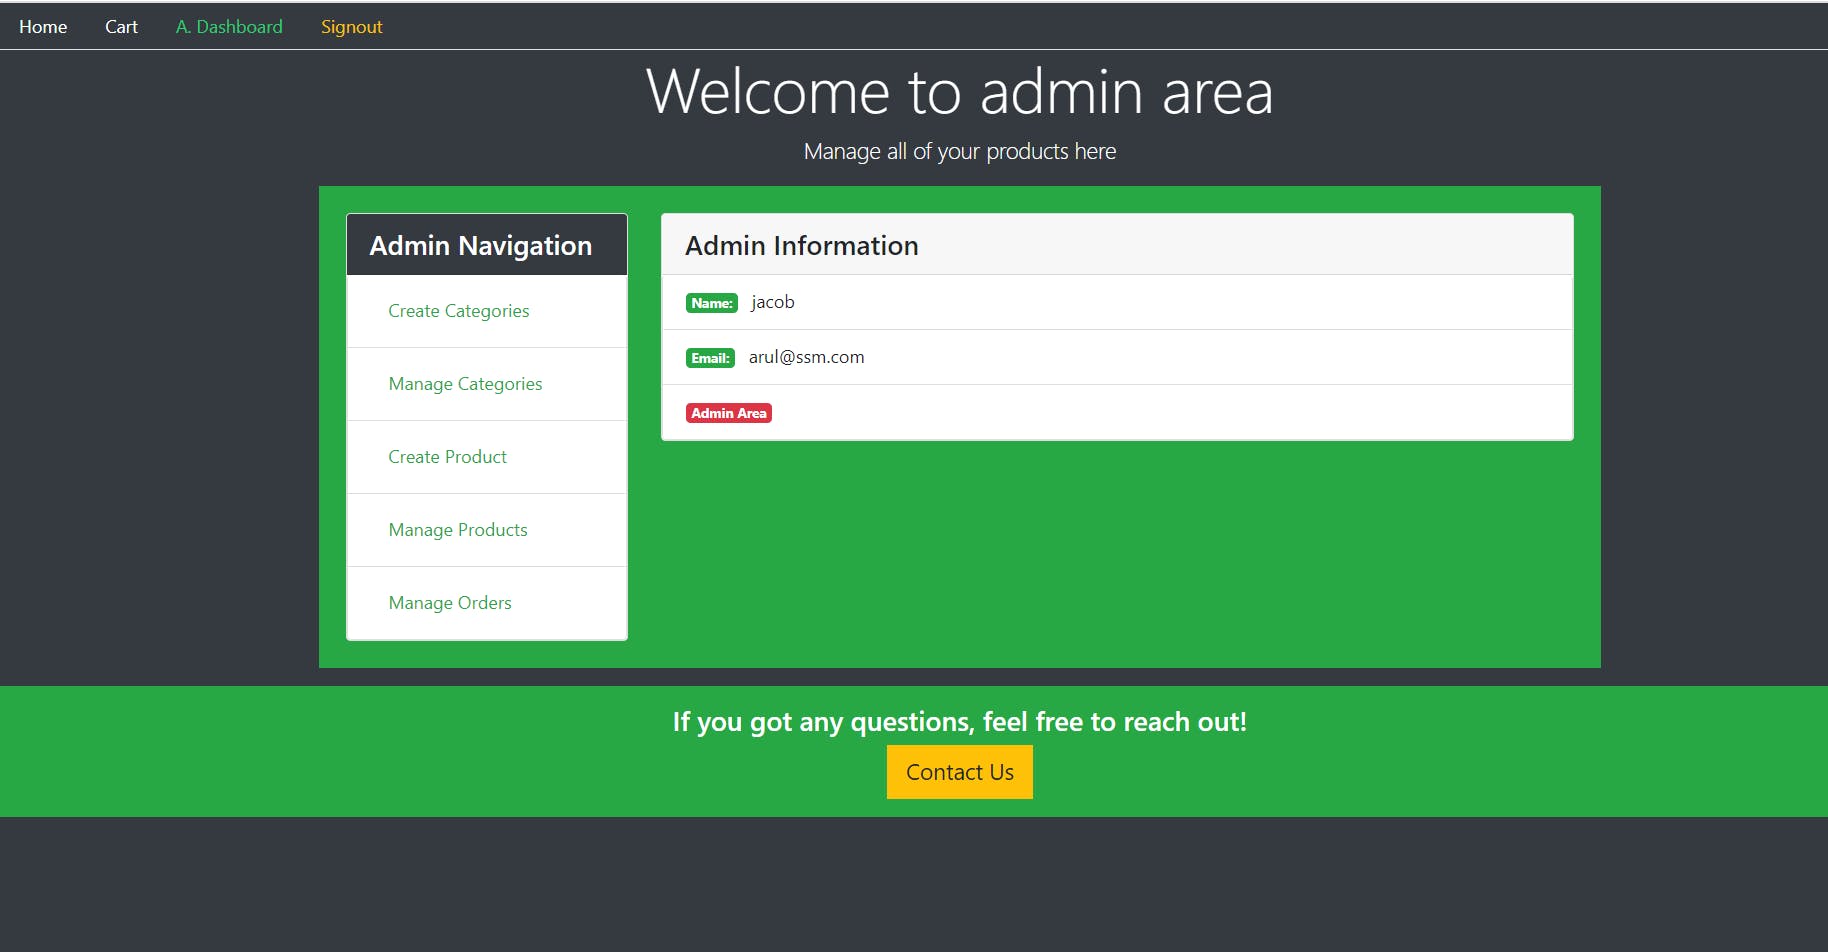
Admin Dashboard:
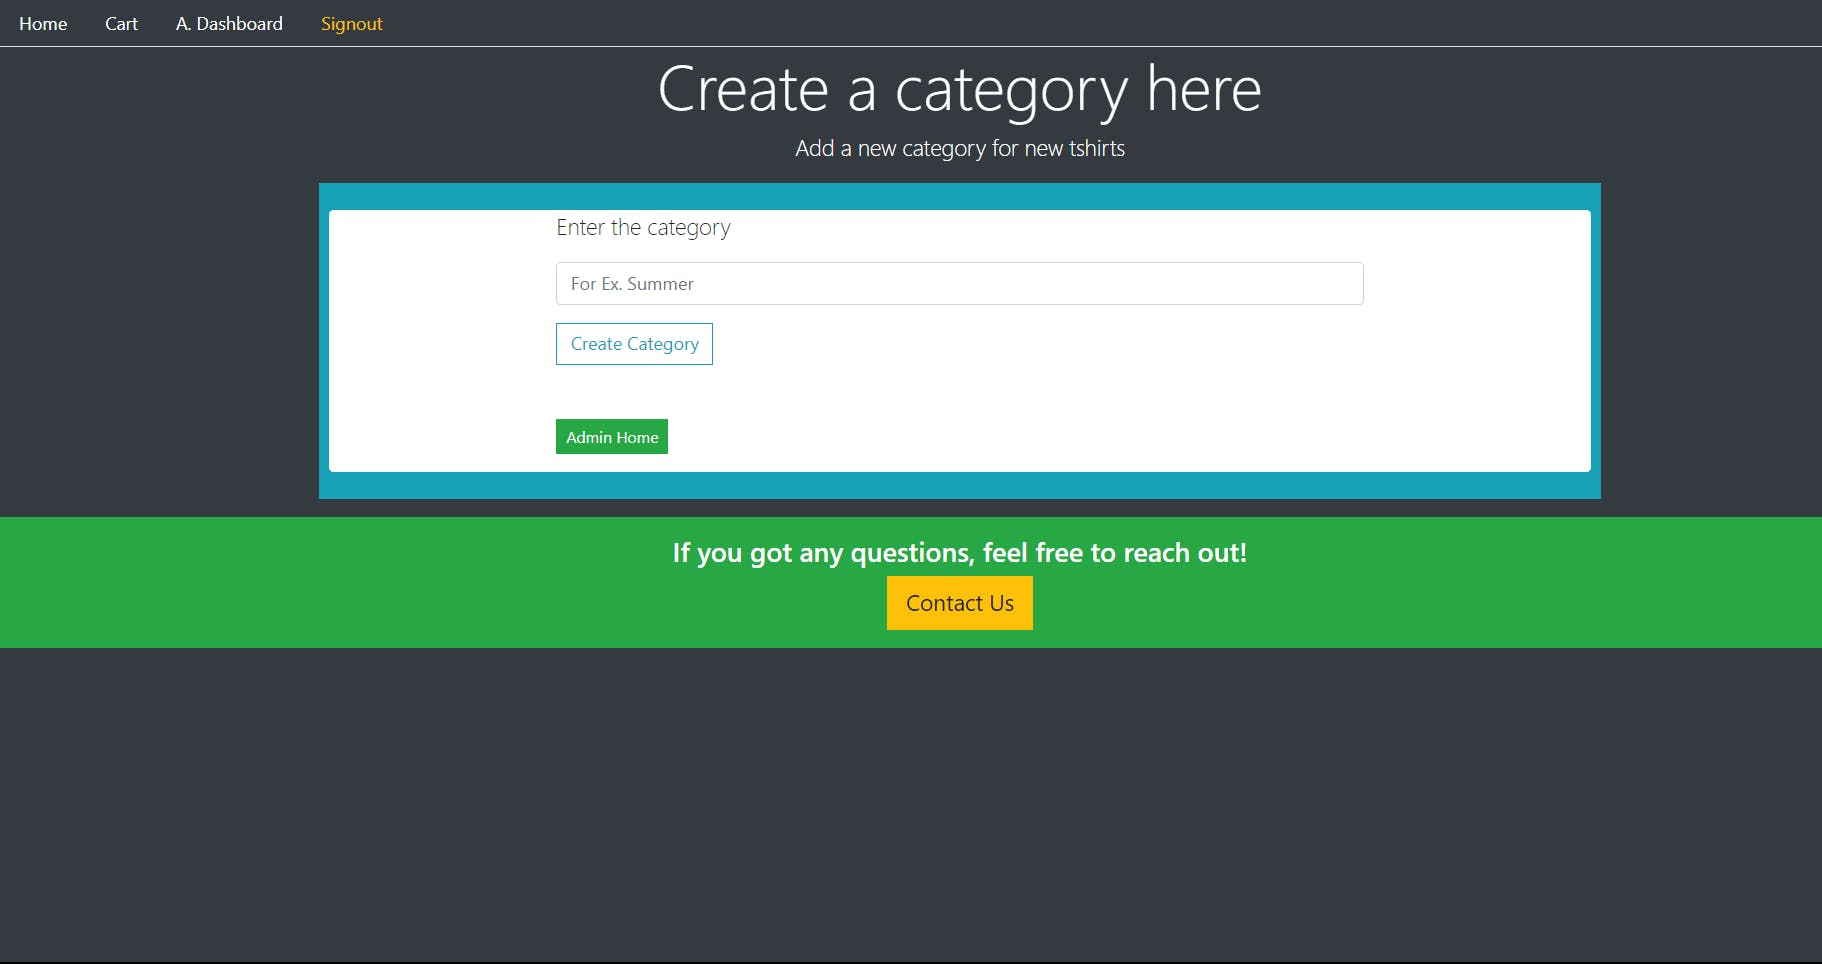
Create Category:
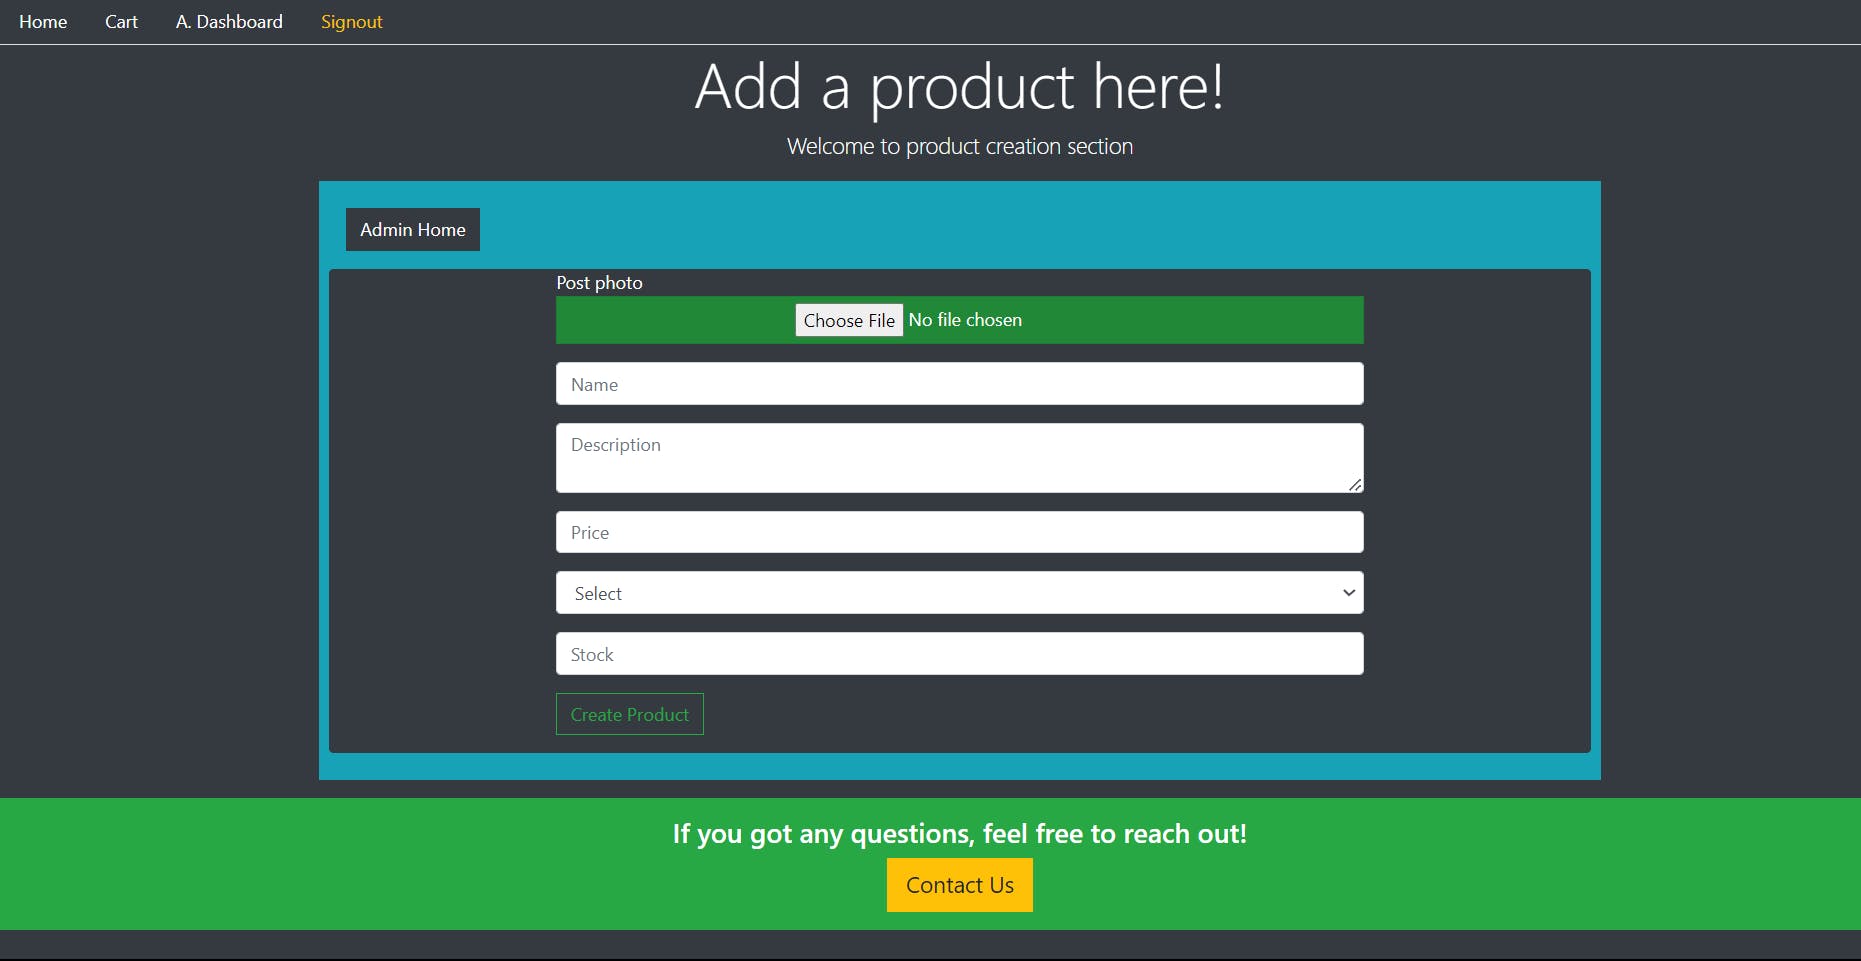
Add Product:
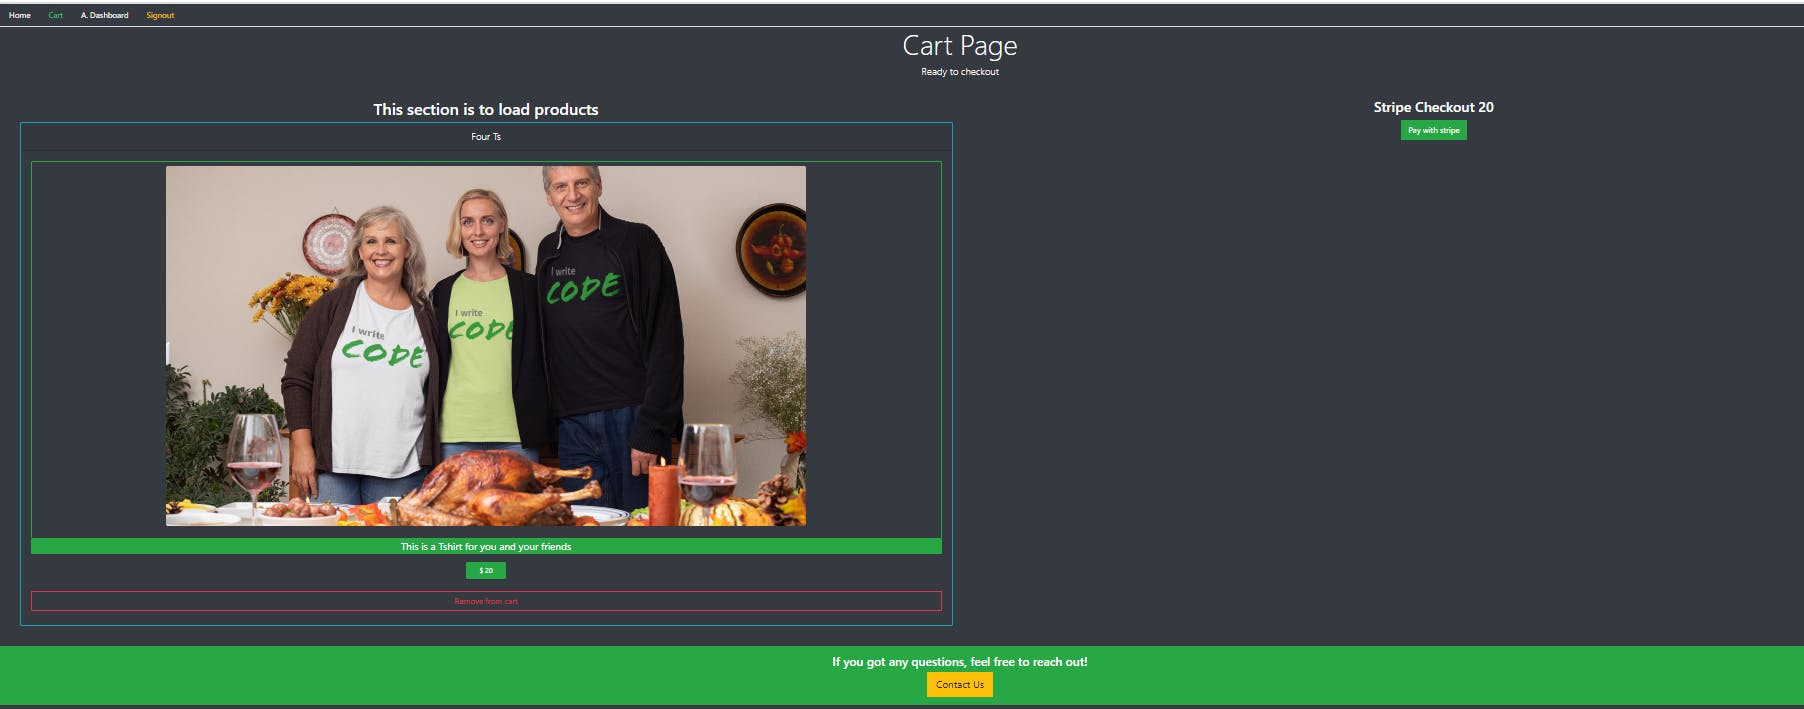
Cart:
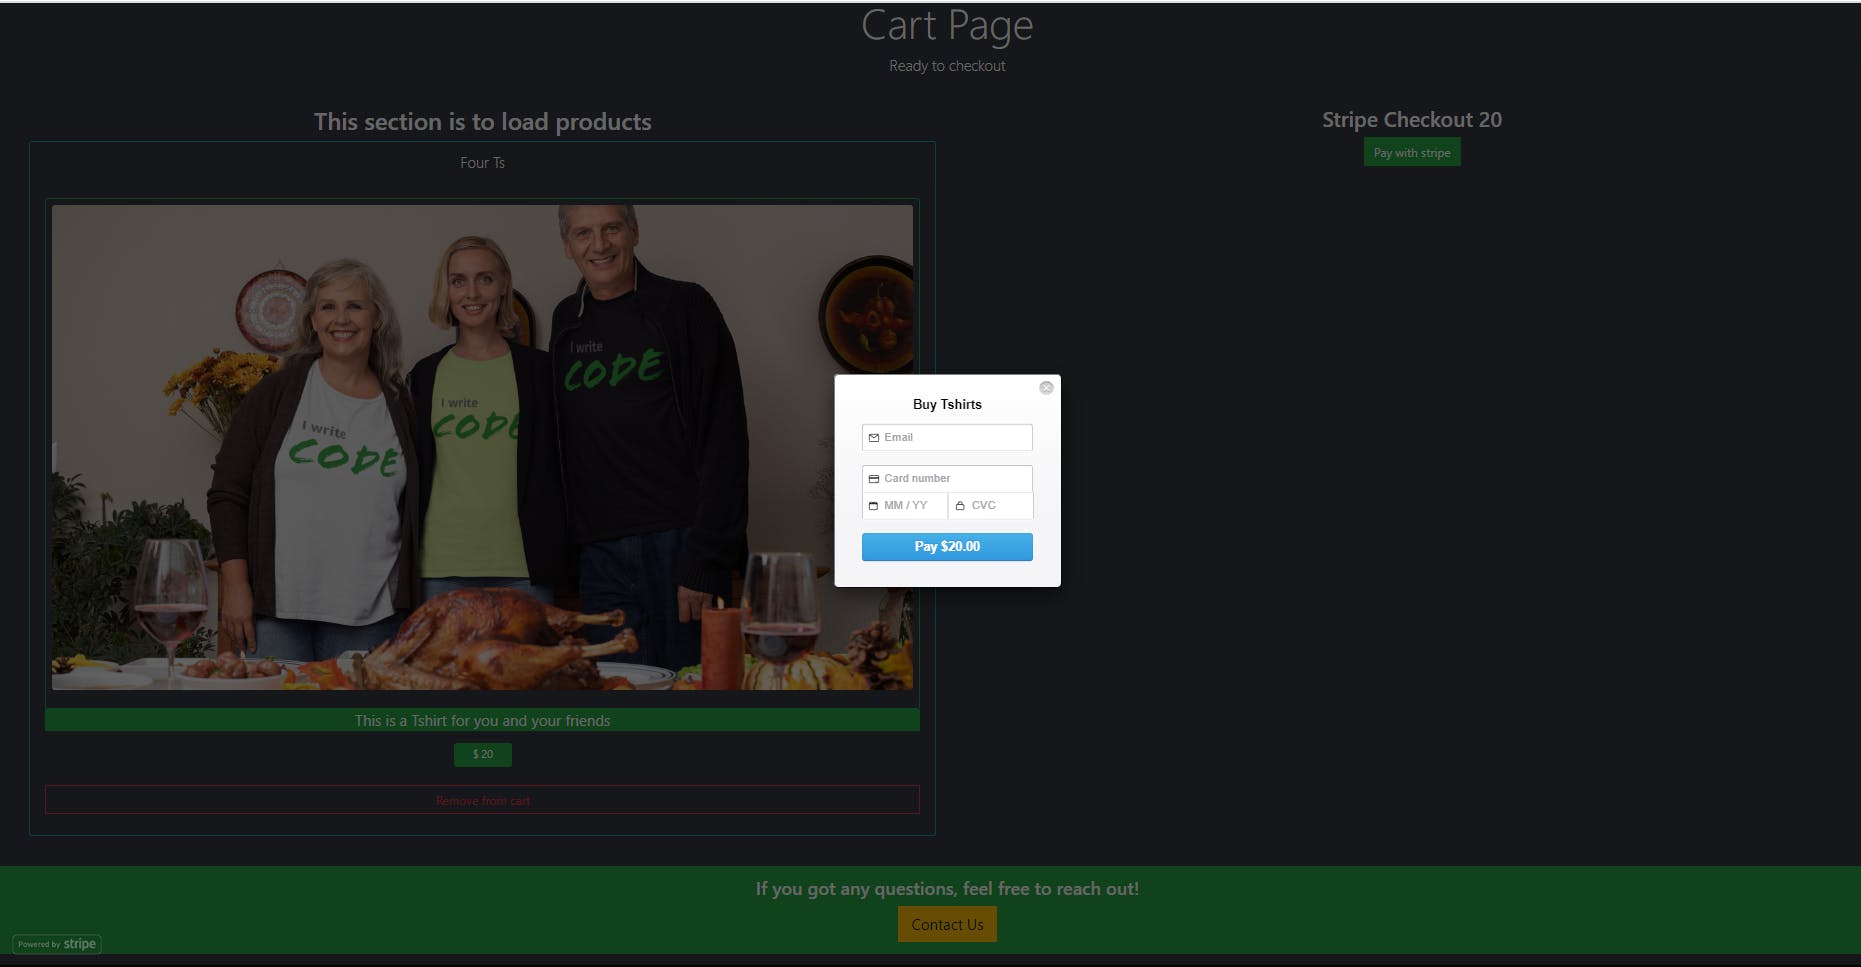
Payment Gateway (Stripe):
Testing different routes using Postman
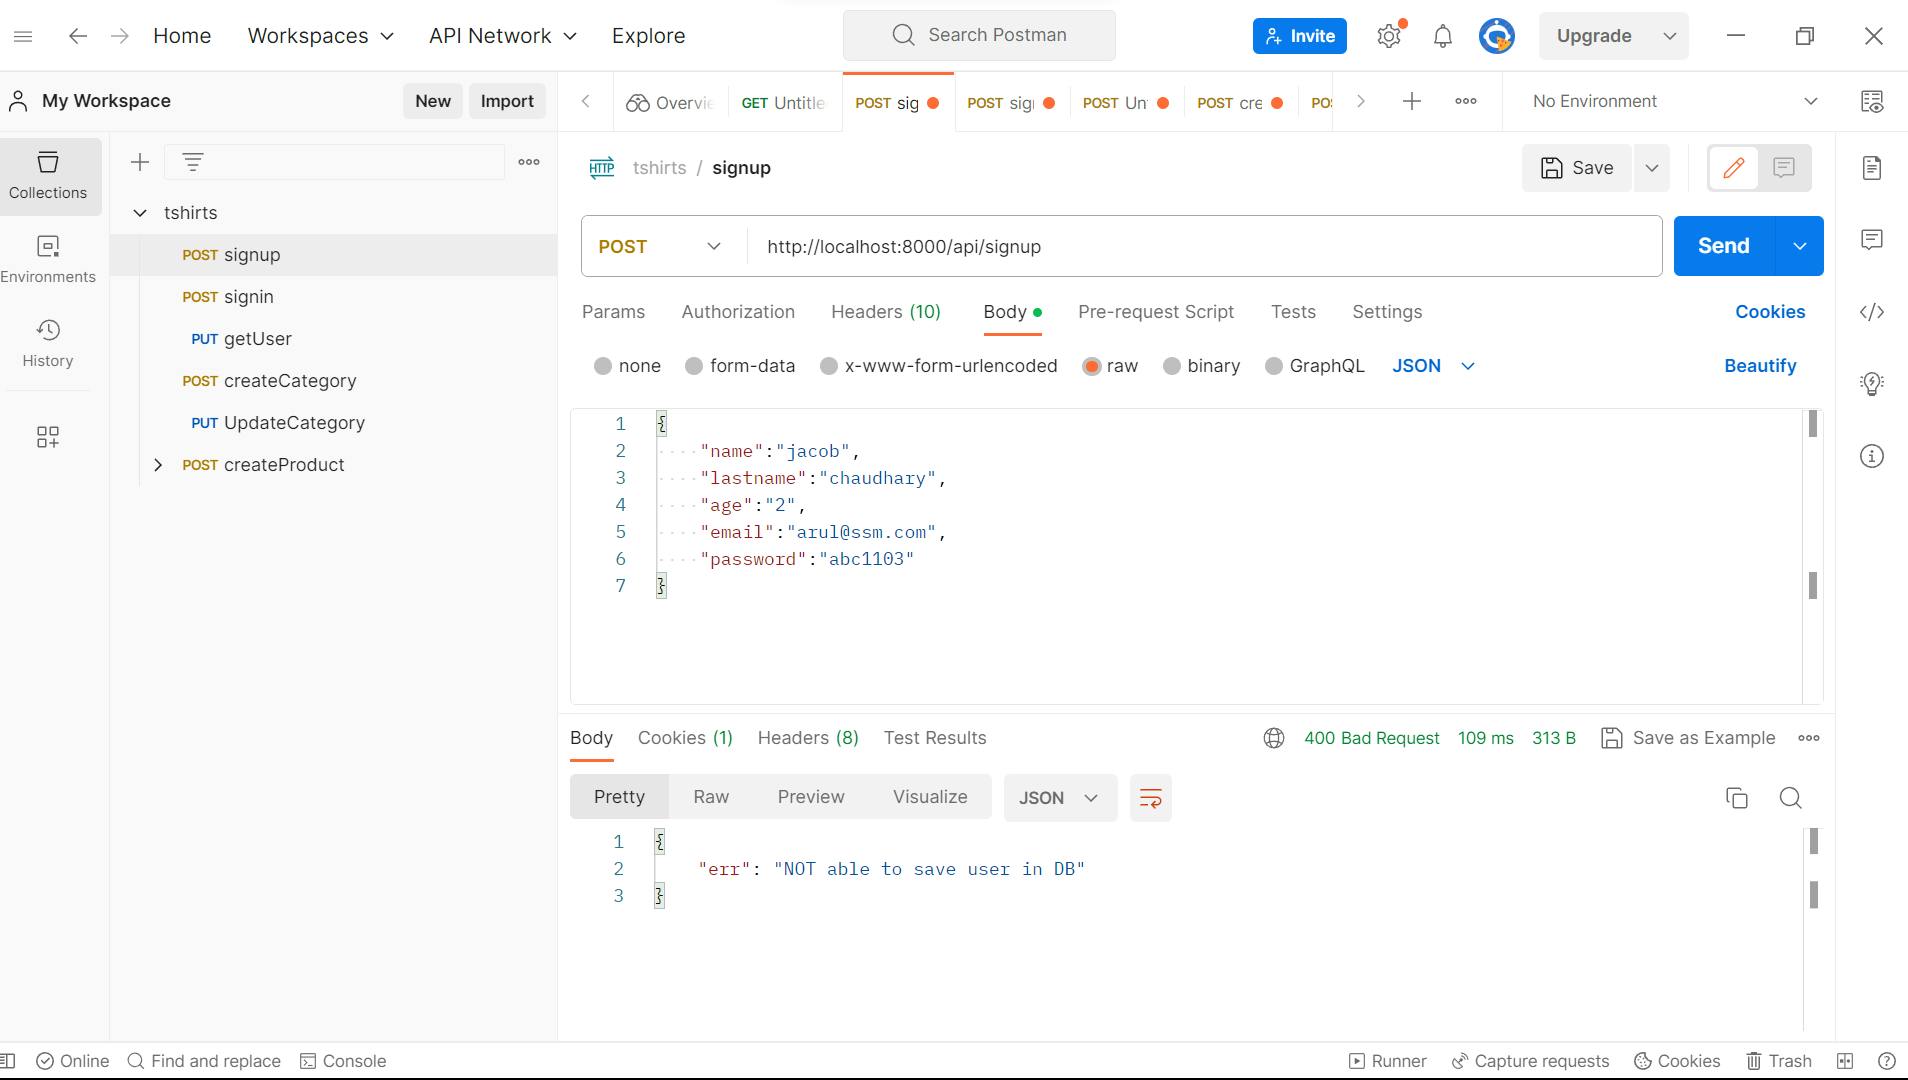
Route 1: Sign Up
Objective: To test the registration process for new users.
Steps Taken:
Request Setup: Using Postman, we crafted a POST request to the
/signupendpoint, providing necessary user details like name, email, and password.Response Analysis: We examined the response status code, ensuring it was as expected (usually 201 Created for successful registration). Additionally, we checked the response body for relevant information such as user ID or a token.
Error Handling: To assess error handling, we intentionally sent invalid data (like a malformed email) and verified if the API responded correctly (usually with a 400 Bad Request).
Duplicate Check: We tested the scenario of signing up with an email that already exists in the system, ensuring the API provided the appropriate response.
Route 2: Sign In
Objective: To validate the process of user authentication.
Steps Taken:
Request Formation: We crafted a POST request to the
/signinendpoint, providing valid credentials (email and password) in the request body.Authentication Check: By analyzing the response, we ensured that a valid user received an authentication token (JWT or similar) and that the response status was correct (typically 200 OK).
Invalid Credentials: Testing the system's security, we provided incorrect login details and verified if the API correctly denied access with a 401 Unauthorized response.

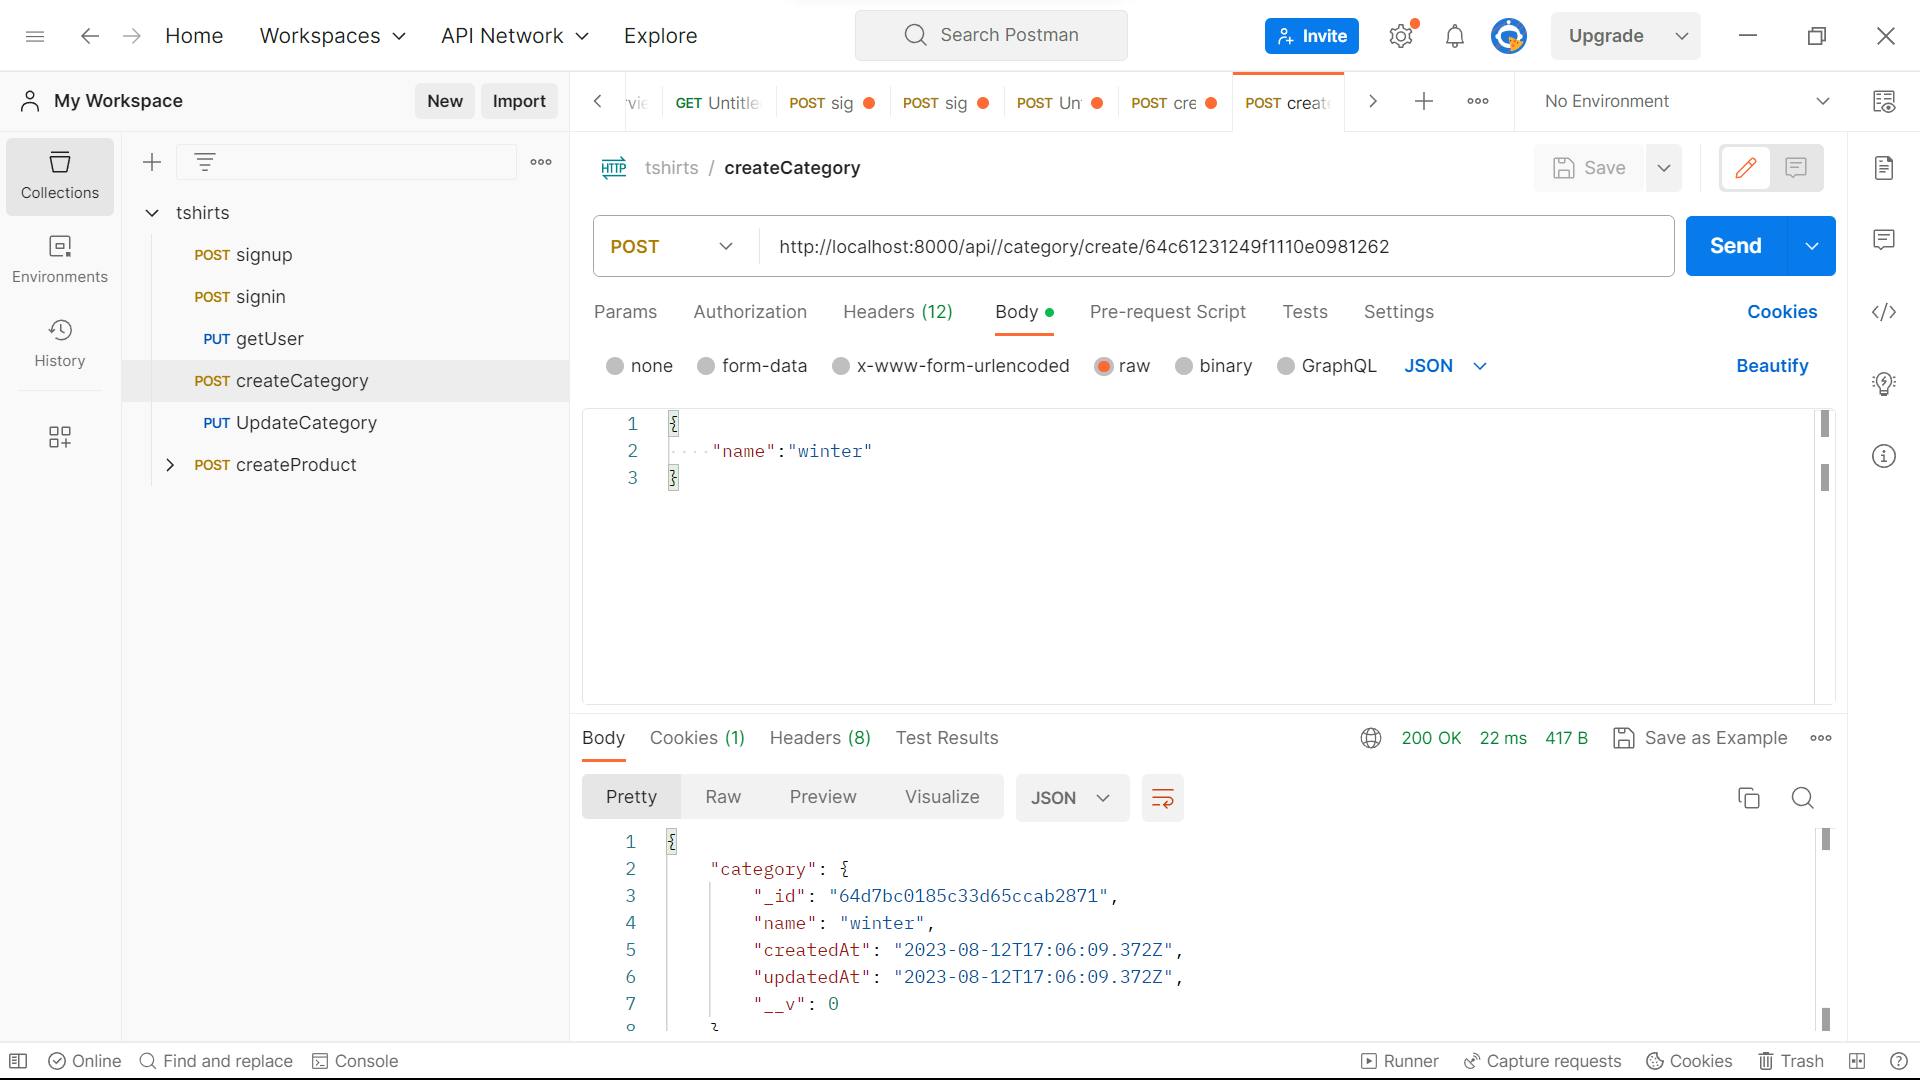
Route 3: Create Categories
Objective: To verify the creation of product categories.
Steps Taken:
Request Creation: Using Postman, we constructed a POST request to the
/categoriesendpoint, including the category name and any additional relevant data.Creation Confirmation: We checked the response status (usually 201 Created) and examined the response body to ensure it contained the newly created category's details.
Validation Checks: In some cases, categories may have specific validation rules (e.g., maximum name length). We tested these rules by intentionally violating them and observing the API's response.
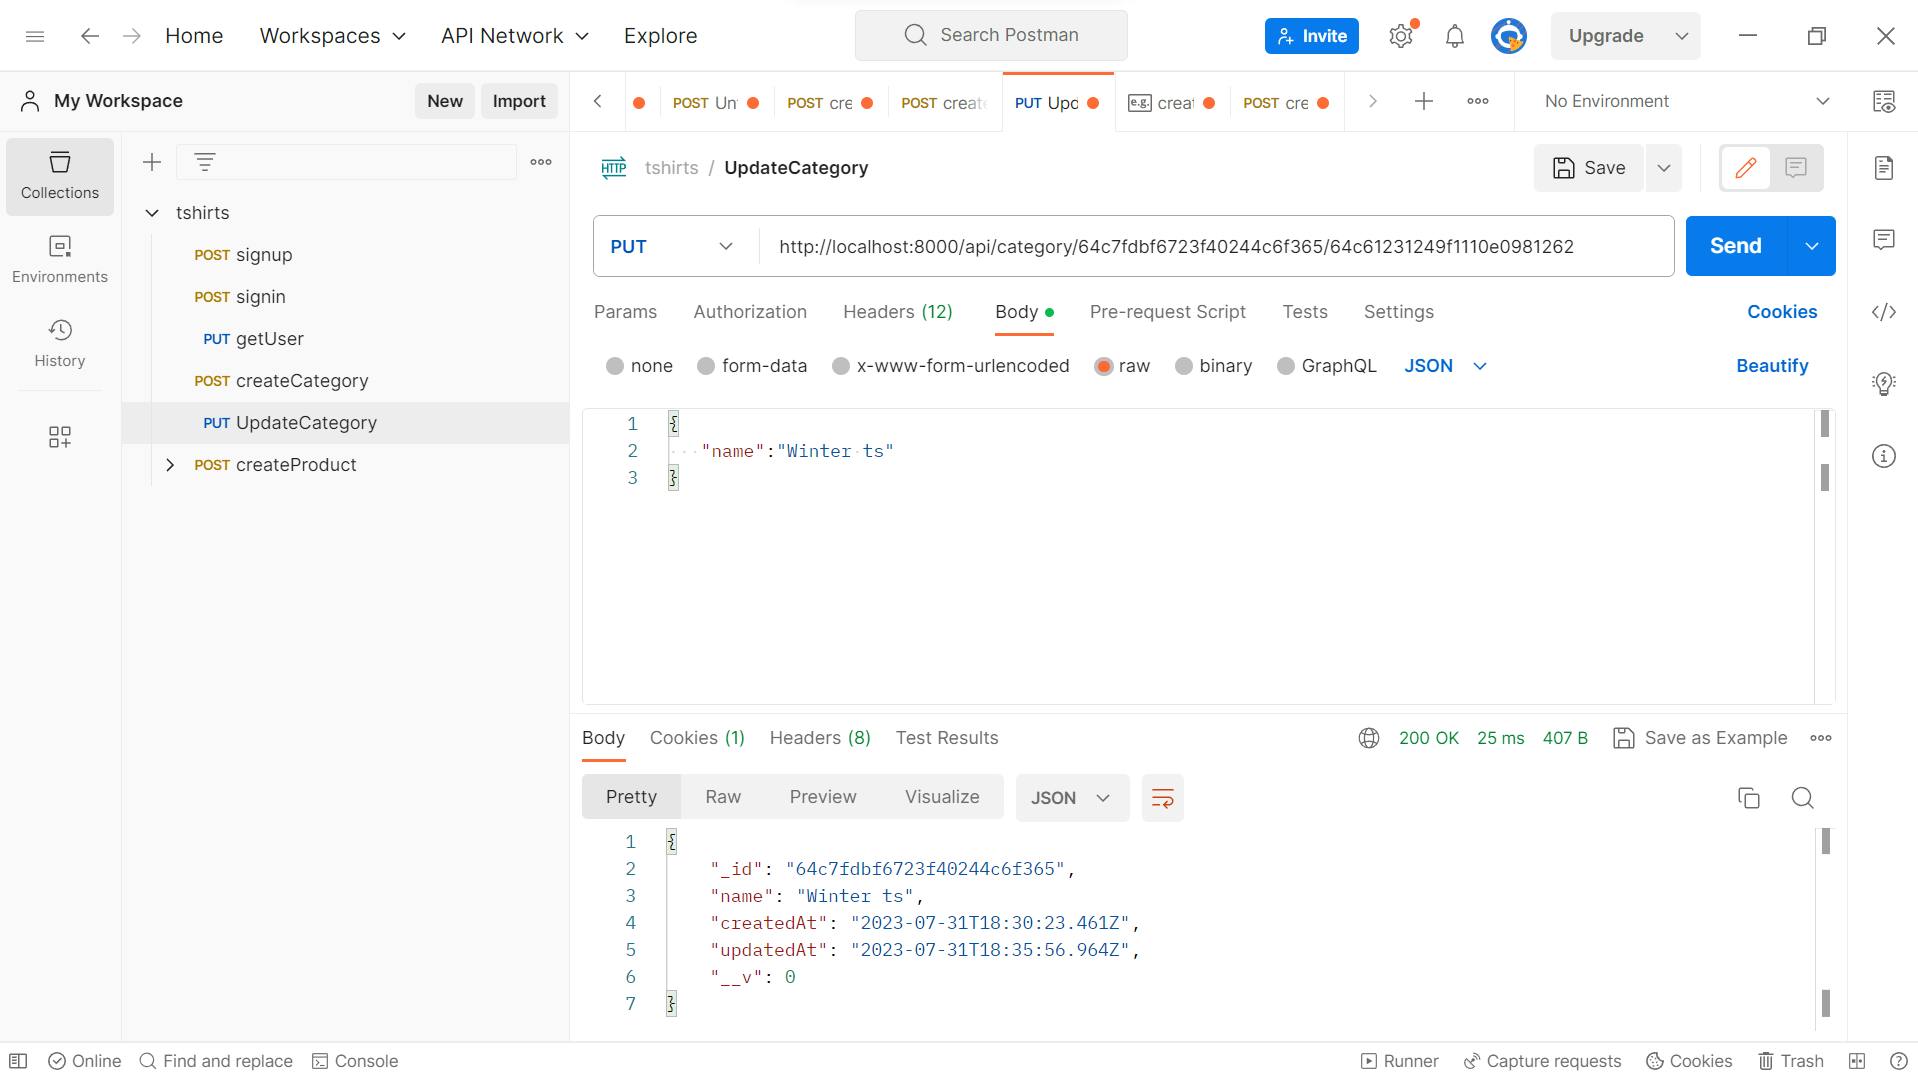
Route 4: Update Categories
Objective: To test the functionality of updating existing product categories.
Steps Taken:
Request Generation: Leveraging Postman's capabilities, we formed a PUT request targeting the
/categories/{category_id}endpoint, where{category_id}represents the ID of the category to be updated. We provided updated category information such as name or description.Confirmation and Changes: Analyzing the response, we ensured that a successful update yielded an appropriate status code (usually 200 OK) and verified that the response contained the updated category details.
Error Scenarios: We proactively tested various error scenarios, like attempting to update a non-existent category, providing invalid data, or using an incorrect request structure. This helped us assess how the API handles such situations and whether it provides meaningful error messages.
Validation: Depending on the requirements, we tested category updates against validation rules, such as ensuring that the category name follows a specific format or adheres to length restrictions.
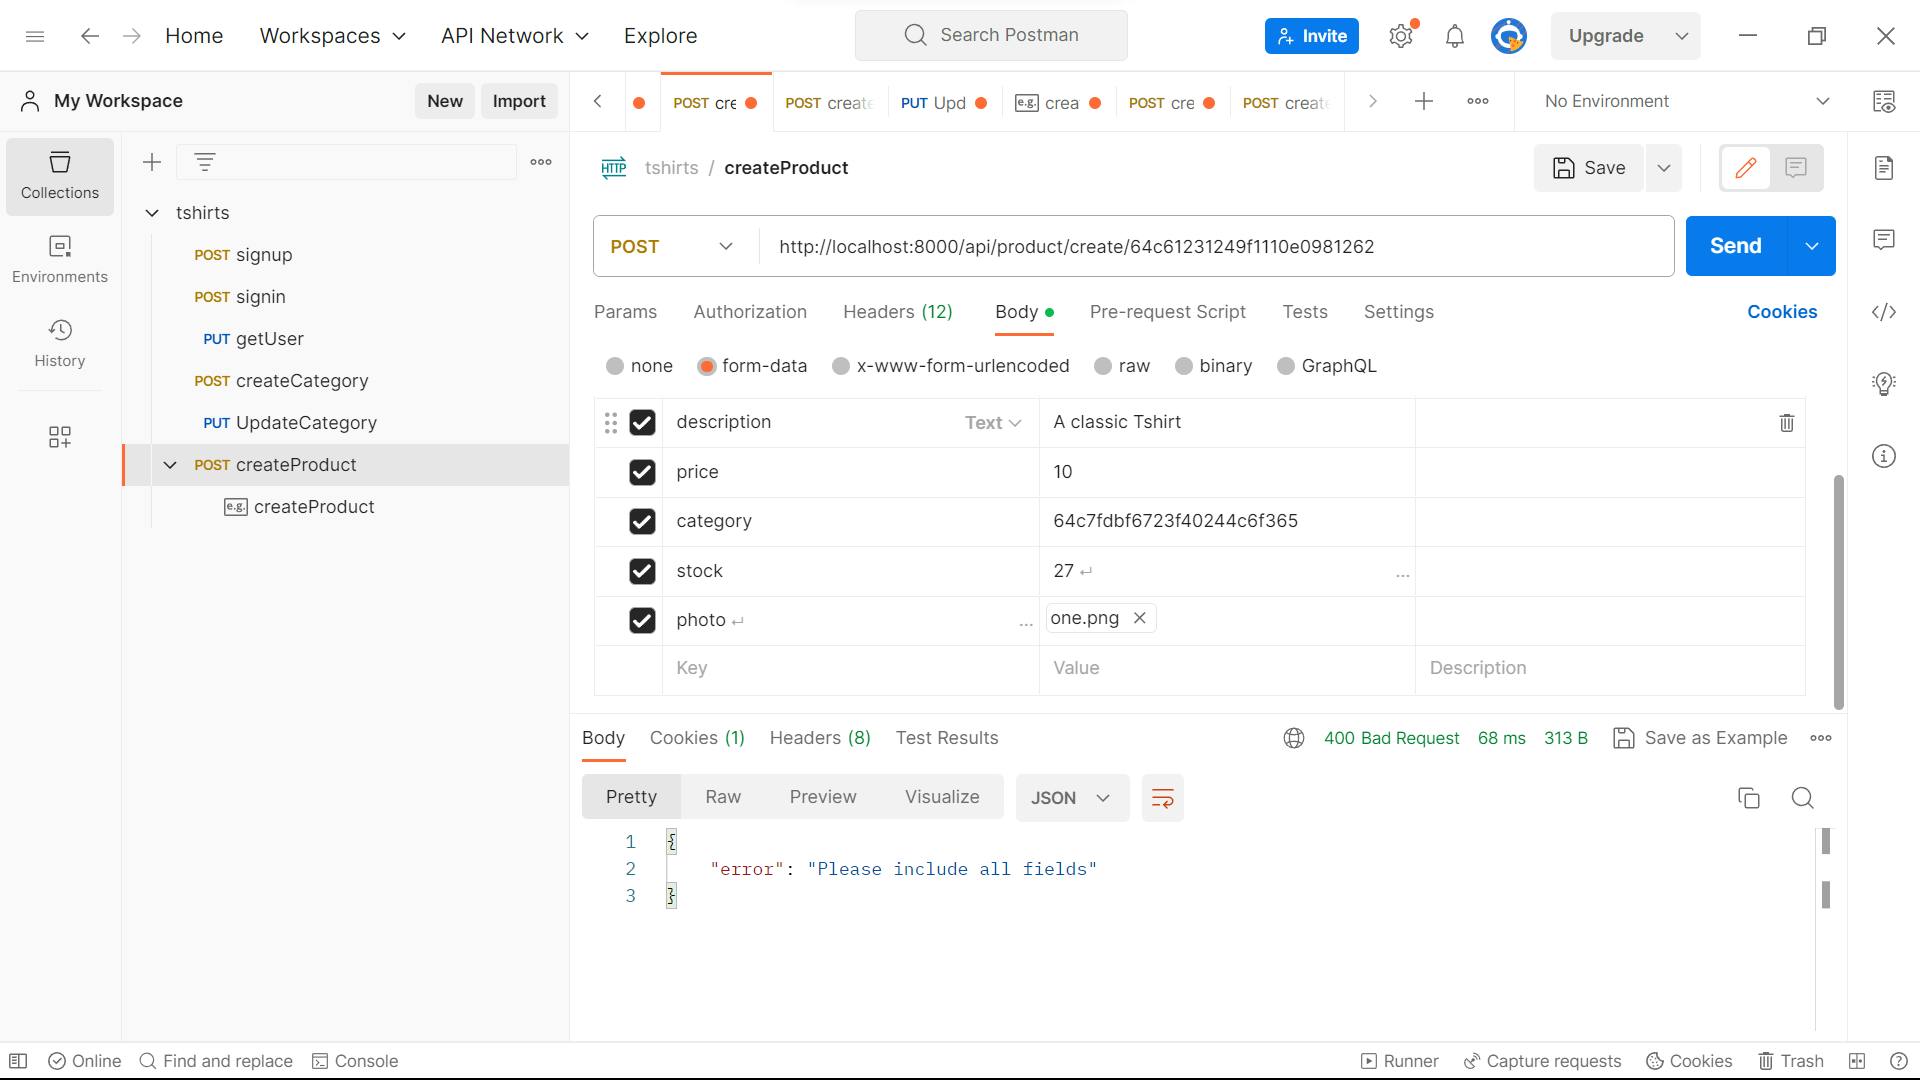
Route 5: Create Products
Objective: To test the process of adding new products to the store.
Steps Taken:
Request Crafting: We designed a POST request to the
/productsendpoint, providing details like product name, description, price, and category.Confirmation and Details: By analyzing the response, we verified if a new product was successfully created (usually 201 Created) and checked if the response included relevant information like the product ID.
Error Handling: To assess robustness, we attempted to create products with incomplete or invalid information, ensuring the API responded appropriately.
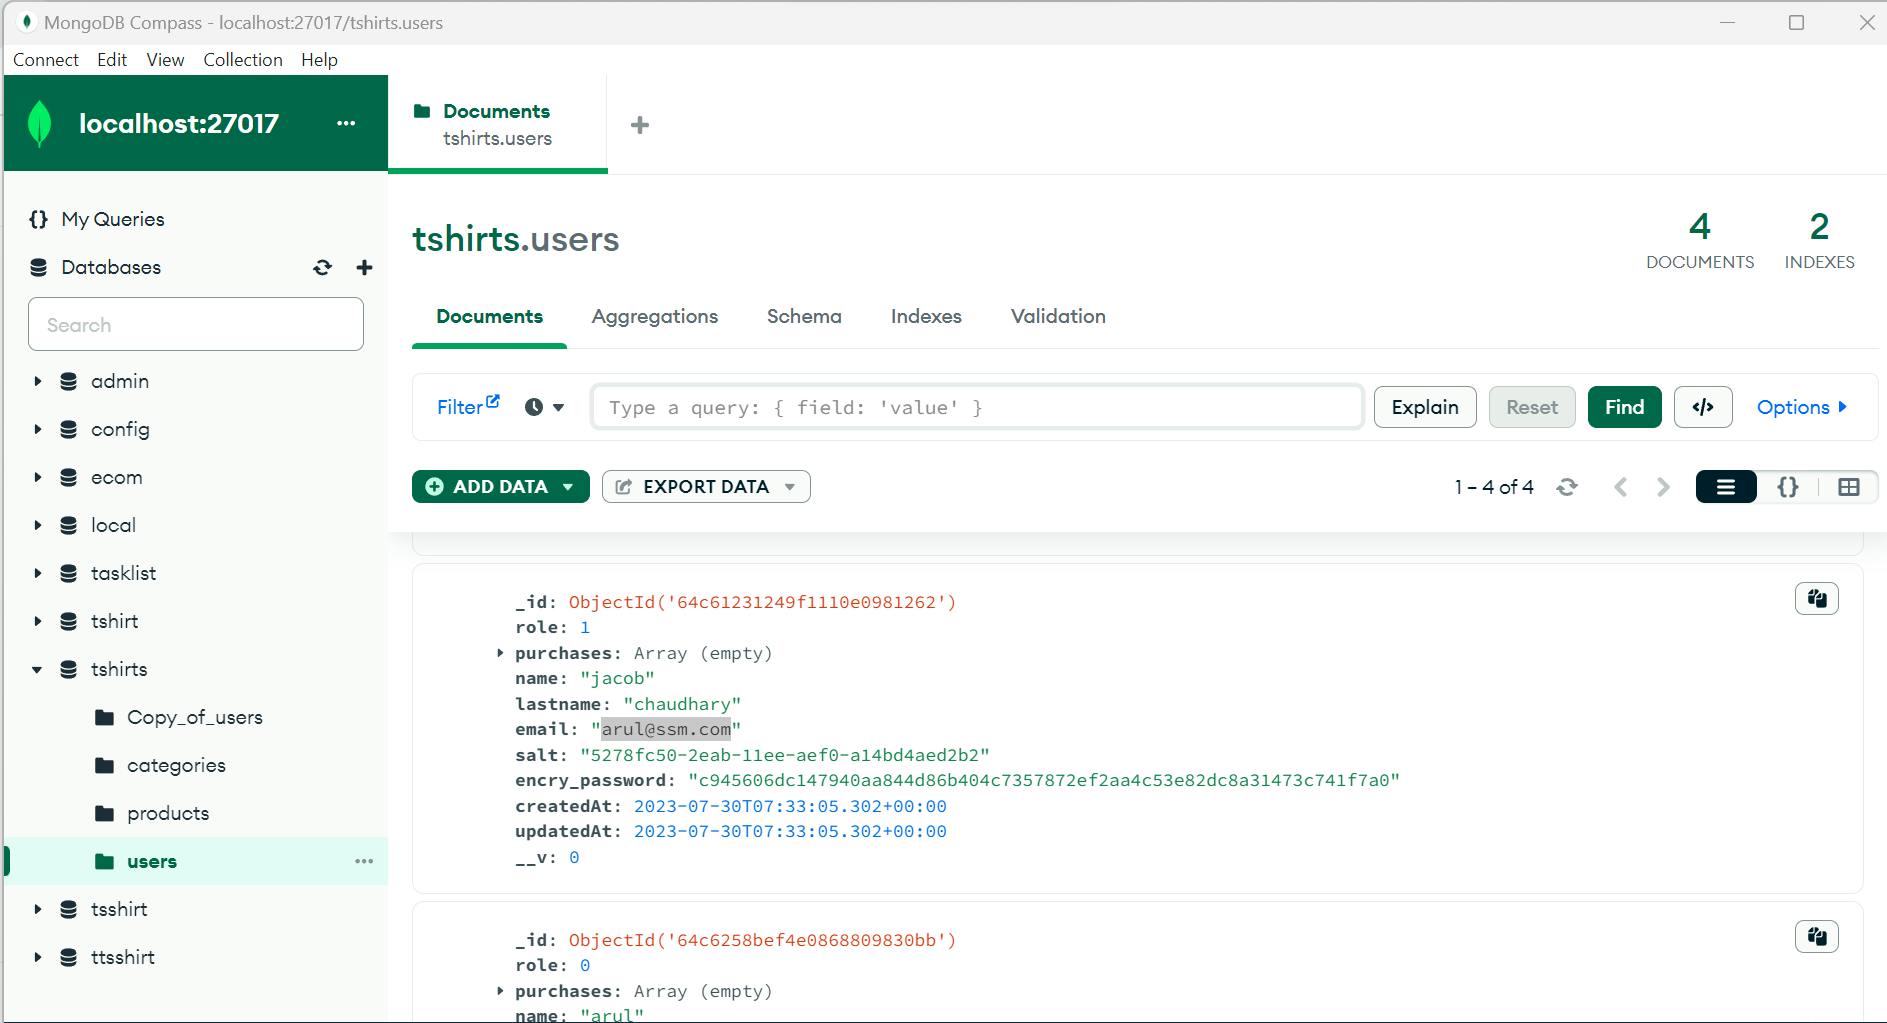
In our e-commerce application, we modified the user database to include a "role" field. By assigning a specific numerical value, we differentiated between regular users and administrators. For instance, a role value of 1 signifies an administrator, while a role value of 0 designates a standard user.
Conclusion
In conclusion, the MERN stack project structure is organized in a way that separates the backend and frontend code. It also follows the MVC architecture pattern. The client directory contains the frontend code, and the server directory contains the backend code. The MERN stack project structure helps in building scalable and robust web applications. By separating the concerns of the application, the codebase becomes more manageable and easier to maintain. If you're looking to build a web application using the MERN stack, it's highly recommended that you follow this project structure.